The two rooms that make their own moisture
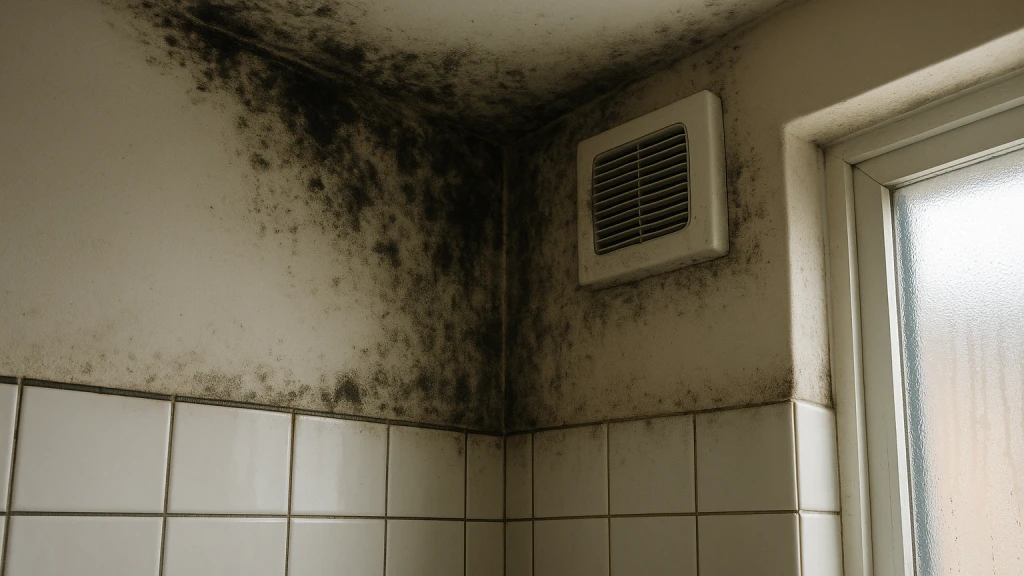
Bathrooms and kitchens are the everyday-moisture rooms, and in a Saint Paul home they earn special attention for a cold-climate reason: we keep them sealed up and heated for the better part of the year. A long winter means months of hot showers steaming up a closed bathroom with the window shut, and months of cooking, boiling, and dishwashing pumping humidity into a kitchen, all while the house is buttoned tight against the cold. That standing humidity, combined with the cold exterior walls these rooms often sit against, gives mold a reliable foothold — on grout and caulk, around the window, in the ceiling corners above the shower, and inside the cabinets where a slow leak hides.
Some of this is cosmetic and genuinely DIY-friendly: surface mildew on tile grout or silicone caulk can often be cleaned, and an honest pro will tell you so rather than sell you a remediation. The line to watch is when growth moves off the hard surface and into porous material — drywall behind the tile, the paper backing of greenboard, the particleboard floor of a vanity cabinet, the subfloor under a leaking toilet. Once it's in the material, surface cleaning won't reach it, and that's when professional removal makes sense.
Where bathroom and kitchen mold actually comes from
The mildew you can see is rarely the whole story. The growth that matters usually traces to one of these:
- Poor or missing ventilation — no exhaust fan, a weak one, a fan that vents into the attic, or simply nobody running it, so shower steam lingers for hours.
- Slow plumbing leaks under sinks, behind toilets, and at supply lines — the quiet drip that swells a cabinet floor or rots the subfloor before you notice.
- Failed grout and caulk letting shower water wick into the wall behind the tile, where it feeds mold you'll never see until the tile loosens.
- Condensation on cold exterior walls and windows in winter, when humid bathroom air meets a single-pane window or an uninsulated wall.
- Old, oversized fixtures and dated waterproofing in the original baths of Saint Paul's many pre-war homes.
The removal process for these rooms
When growth has moved into porous materials, a licensed crew typically works through a focused version of the standard sequence:
- Find the moisture: a leak under the sink, a failed shower pan, a venting gap — the source has to be identified and stopped first.
- Contain the area: for anything beyond a small spot, sealing the room and using HEPA air filtration so spores don't spread to the rest of the house.
- Remove affected materials: taking out mold-damaged drywall, cabinet bases, subfloor, or trim that can't be cleaned.
- Clean and treat: HEPA-vacuuming and wiping salvageable surfaces and framing, then treating with an antimicrobial.
- Dry thoroughly: bringing the cavity and subfloor back to a safe moisture level before rebuilding.
- Rebuild and prevent: replacing with moisture-tolerant materials, and often upgrading the exhaust fan and re-sealing the wet areas.
Ventilation is the long-term fix
For Saint Paul bathrooms especially, the single most effective prevention is real exhaust ventilation that vents to the outside, runs during and after every shower, and is sized for the room. A startling number of homes have a bath fan that either doesn't work, doesn't run, or vents into the attic — which simply moves the moisture problem from the bathroom ceiling to the attic sheathing. In the kitchen, a range hood that actually exhausts outdoors (rather than recirculating) and a habit of running it while cooking makes a real difference over a long indoor season. These low-cost fixes do more to prevent recurrence than any spray or coating.
When it's bigger than it looks
The classic Saint Paul surprise is the bathroom on the second floor or above a finished basement, where a slow leak around the toilet flange or shower drain has been wicking into the subfloor and dripping into the ceiling below for months. By the time a stain appears on the ceiling downstairs, the floor structure may be involved and the affected area is much larger than the visible spot. The same goes for an under-sink leak that has quietly fed the wall cavity. If you find soft flooring, a swollen cabinet base, a recurring stain, or a musty smell that won't quit, it's worth an inspection to map the true extent before you start tearing into tile.
What bathroom and kitchen mold removal costs
These are often among the more affordable mold jobs precisely because they're usually localized — a single vanity, a section of shower wall, a patch of subfloor. A contained surface job can be a few hundred to low four figures; the cost climbs when a long-running leak has reached the subfloor, the joists, or the ceiling of the room below, turning a cosmetic fix into a structural one. The biggest variable is how long the leak ran before discovery, which is the best argument for acting on a small problem now rather than waiting. Rough out a range with our estimator, or tell us what you're seeing and we'll match you with a licensed local pro for a free, no-pressure assessment.